A plastic power tool box is an essential item for organizing your tools and keeping everything in one place. However, over time, dirt, dust, and grime can build up, making it difficult to keep your tools properly organized and accessible. Regular cleaning and maintenance are essential to ensure that your toolbox lasts longer, stays functional, and helps you keep your tools in top condition.
1. Empty the Toolbox
Step 1: Remove All Tools and Accessories
Before you start cleaning, the first thing you need to do is empty the toolbox. This not only makes it easier to clean but also gives you a chance to inspect your tools for any damage or wear. Take out every tool, screw, nail, or small accessory stored in the toolbox. Place them on a clean surface for inspection and sorting.
Step 2: Check for Broken or Missing Parts
While you have everything removed from the toolbox, it’s an ideal time to check for any broken latches, handles, or missing screws. If you notice any damage, it may be time to replace those parts. Ensure your toolbox is in good working condition so that it can perform its function of safely storing your tools.
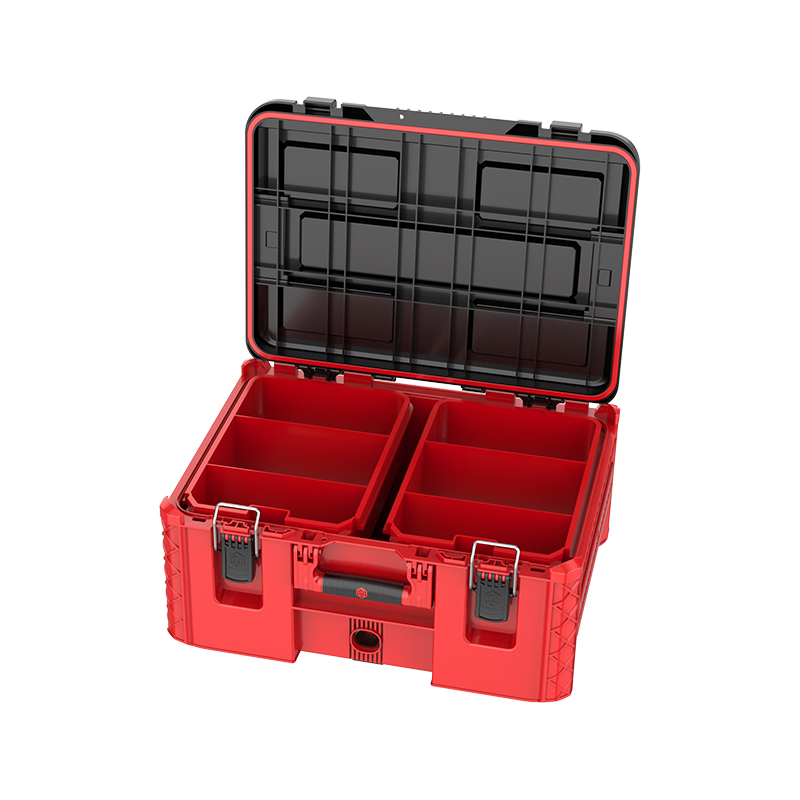
2. Wipe Down the Interior and Exterior
Step 1: Use Warm, Soapy Water
Once the toolbox is empty, take a soft cloth or sponge and dip it into warm, soapy water. Start wiping down the interior of the toolbox, focusing on the bottom and corners where dirt and dust tend to accumulate. The plastic material of most toolboxes is resistant to most cleaning agents, so soapy water should be sufficient to remove most dirt and grime.
Step 2: Clean the Exterior
After cleaning the interior, turn your attention to the exterior of the toolbox. Use the same warm, soapy water and wipe the entire outside, paying attention to the handles, edges, and any areas with visible dirt or stains. These parts often get dirty from frequent handling, so make sure to scrub them thoroughly.
Step 3: Tackle Stubborn Dirt
For stubborn dirt that doesn’t come off with soapy water, you may need to apply a stronger cleaning solution. Mild household cleaners or a mixture of vinegar and water can be effective in removing stubborn grime. However, avoid using harsh chemicals like bleach, as they can degrade the plastic material over time.
3. Remove Stubborn Dirt or Grease
Step 1: Use Vinegar and Water
Sometimes, your toolbox may accumulate grease or sticky substances from tools or materials. A mixture of equal parts vinegar and water can be highly effective for breaking down grease. Apply this solution to a cloth or sponge and scrub the affected areas. Vinegar is a natural degreaser and can help eliminate any residue without damaging the plastic.
Step 2: Use Rubbing Alcohol for Tougher Stains
For really tough stains, rubbing alcohol can be a good solution. Apply a small amount of rubbing alcohol to a cloth and gently rub the stained area. Alcohol evaporates quickly and won’t harm the plastic, but it’s effective in lifting sticky residue.
Step 3: Mold or Mildew Removal
If you notice mold or mildew, it’s important to act fast, as they can damage the toolbox over time. A diluted bleach solution (1 part bleach to 10 parts water) can help remove mold or mildew. However, make sure to rinse the area thoroughly after cleaning, as bleach can cause discoloration if left on the plastic.
4. Check for Cracks or Damage
Step 1: Inspect the Toolbox for Cracks
After cleaning, carefully inspect your toolbox for any visible cracks or damage. Look at the corners, edges, and the areas where the lid hinges and locks meet the main body. Cracks or stress marks are common signs of wear and can compromise the structural integrity of the toolbox.
Step 2: Replace or Repair Damaged Parts
If you find cracks, it may be possible to repair them using a plastic repair kit. These kits typically include adhesive compounds designed to bond to plastic surfaces and create a strong seal. For larger cracks or significant damage, you might need to replace the affected parts or even the entire toolbox.
Step 3: Avoid Overloading or Exposure to Extreme Temperatures
To prevent cracks and other forms of damage, avoid overloading your toolbox. Overstuffing can put unnecessary pressure on the plastic and lead to cracking or warping. Additionally, storing your toolbox in extreme temperatures—whether in direct sunlight or freezing conditions—can cause the plastic to become brittle. Always store your toolbox in a cool, dry place.
5. Clean and Lubricate the Latches and Hinges
Step 1: Clean the Latches and Hinges
The latches and hinges of your toolbox are crucial for securing your tools, so it’s essential to keep them in good working order. Use a damp cloth to wipe down the hinges and latches, removing any dirt or buildup that could affect their function. Pay special attention to the areas around the latch mechanism, as these can collect dust and grime.
Step 2: Lubricate for Smooth Operation
After cleaning, apply a lubricant to the hinges and latches to ensure smooth operation. It’s best to use a silicone-based lubricant or graphite powder. These lubricants are non-oily, so they won’t attract dust or dirt, which can make the latches and hinges sticky over time. Simply apply a small amount to the moving parts and work them a few times to distribute the lubricant evenly.
Step 3: Avoid Oil-Based Lubricants
Avoid using oil-based lubricants or WD-40, as they can attract dust and grime, making the mechanisms harder to operate over time. Stick with silicone or dry lubricants, which are cleaner and less likely to cause problems.
6. Dry the Toolbox
Step 1: Wipe Away Excess Moisture
After cleaning your toolbox, use a dry cloth to wipe away any excess moisture. Leaving moisture inside the toolbox could lead to rust or corrosion on metal tools and parts, so it’s important to ensure everything is dry before storing your tools back inside.
Step 2: Air Dry Completely
Allow your toolbox to air dry completely before you put any tools back inside. This step is especially important if the toolbox has been thoroughly cleaned with water or a cleaning solution. Any residual moisture could cause your tools to rust or cause the toolbox to develop unpleasant odors.
7. Organize the Contents
Step 1: Sort Your Tools
Now that your toolbox is clean and dry, it’s time to sort your tools and accessories. Group similar tools together to make it easier to find what you need later. You can organize your tools by size, function, or frequency of use, depending on what works best for you.
Step 2: Use Small Storage Containers or Organizers
For small parts like screws, nails, washers, and drill bits, consider using small storage containers or dividers to keep them organized. Many plastic power tool boxes come with removable trays or compartments that can help separate these smaller items. If your toolbox doesn’t have built-in dividers, you can buy separate organizers that fit inside.
8. Regular Maintenance
Step 1: Check for Wear and Tear
Even with regular cleaning, your toolbox will undergo wear and tear. It’s important to periodically check for any signs of cracks, damage, or wear, especially around areas that undergo a lot of stress, such as the latches and hinges.
Step 2: Keep Your Toolbox Stored Properly
Finally, always store your plastic toolbox in a cool, dry location to prevent environmental factors from causing damage. Avoid placing it directly on the ground where it could be exposed to moisture or dirt.
Cleaning and Maintenance Checklist for Plastic Power Tool Boxes
| Step | Action | Frequency |
|---|---|---|
| Empty Toolbox | Remove all tools and inspect for damage | As needed |
| Wipe Down Interior/Exterior | Use soapy water for general cleaning | Every 1-2 months |
| Remove Stubborn Dirt | Use vinegar, rubbing alcohol, or bleach for tough stains | As needed |
| Inspect for Cracks/Damage | Check for cracks, stress marks, or wear | Every 3-6 months |
| Clean and Lubricate Latches/Hinges | Wipe down and lubricate moving parts | Every 3-6 months |
| Dry Thoroughly | Use a dry cloth and allow air drying | After each cleaning |
| Organize Tools | Sort tools and use organizers | As needed |
| Regular Maintenance | Check for damage and clean regularly | Monthly |


